
WESTHILL WATCH BOXES
Heritage Collection
Westhill Watch Boxes is an Australian brand known for exceptional craftsmanship and quality. We take pride in offering high-end watch winders and watch safes, trusted by collectors and enthusiasts alike. Designed with precision and innovation, our premium safes and winders provide the perfect blend of security, durability, and elegance to protect your valuable timepieces.
This watch winder is built to the highest standards, ensuring superior performance and reliability. Every detail has been carefully crafted to meet the needs of watch collectors who value both functionality and aesthetics.
How to Use Your Watch Winder
Your safe is delivered without registered fingerprints. For initial access, any fingerprint can be used together with the default passcode.
Default Passcodes
- 168
- 88888888
Opening Procedure
1. Install 4 x AA batteries into the external emergency battery pack.
2. Connect the external battery pack to the emergency power port located on the front of the safe. A confirmation beep will indicate power has been connected successfully.
3. Touch any keypad button to activate the display. Enter the default passcode followed by the “E” confirmation button. Alternatively, place any fingerprint on the scanner. A green light confirms successful verification.
4. Turn the handle clockwise fully to open the door.
(For compact models without handles, the door will automatically release after successful verification.)
5. Once opened, remove the external battery pack. Install 4 x AA batteries into the internal battery compartment located behind the battery cover.
Your safe is now ready for personalised setup.

SETTINGS & CONFIGURATION
Open the battery compartment cover to access the internal control buttons.
SET Button
- Press once to register fingerprints or passcodes.
- Press and hold to restore factory settings and remove all saved users.
WiFi Button
- Press once to switch between Common Mode and Security Mode.
- Press and hold for 3 seconds to begin Tuya App pairing.
When pairing mode is active, the indicator light will flash green.
Open the Tuya Smart App and follow the on-screen instructions to complete connection.
Registering Fingerprints & Passcodes
Your Westhill Watch Safe supports up to 30 fingerprints.
To Add a Fingerprint
-
Press the SET button once. The safe will beep and the indicator light will illuminate blue.
- Place your finger onto the fingerprint scanner. When prompted, remove and replace the same finger. Repeat this process 4 times.
- A green light confirms successful registration. If the light turns red, the registration was unsuccessful and the process must be repeated.
Repeat these steps to register additional fingerprints.
To Add a Passcode
- Press the SET button once. The indicator light will illuminate blue.
- Enter a 3–8 digit passcode followed by the “E” confirmation button.
- Re-enter the same passcode and confirm again with “E”. A green light confirms successful registration.
If the light flashes red, the passcode setup has failed or the passcode already exists.
DELETING INCORRECT INPUTS
If an incorrect passcode is entered before confirmation, press the “C” button to clear the current entry.
RESTORING FACTORY SETTINGS
To restore factory settings and delete all registered fingerprints and passcodes:
- Press and hold the SET button for approximately 5 seconds.
- The indicator light will turn green.
- All stored user data will be removed and the safe will return to factory default settings.
Unlocking Modes
Your Westhill Elite Watch Safe includes two security operating modes.
Common Mode
Unlock using either:
- One registered fingerprint
OR - One registered passcode
Security Mode
Unlock using:
- One registered fingerprint
PLUS - One registered passcode
Switching Modes
Press the WiFi button once to switch between modes.
The safe defaults to Common Mode from factory.
Important
Security Mode requires at least:
- One registered fingerprint
AND - One registered passcode
Without both registered, Security Mode cannot operate.
LCD Control Panel
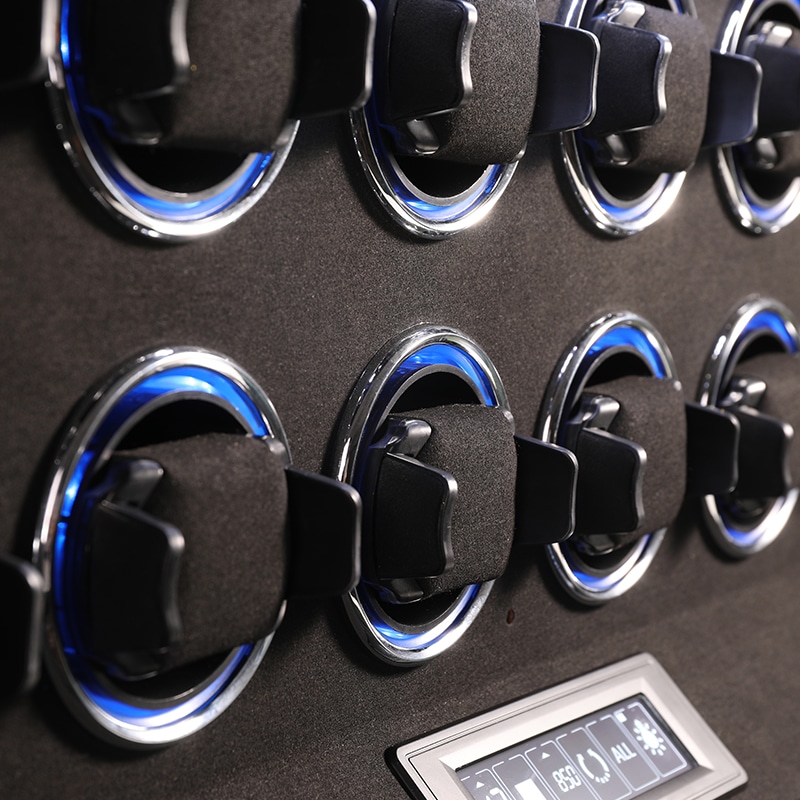
The LCD control panel allows you to customise each watch winder motor independently, including winding direction, Turns Per Day (TPD), lighting functions and New Watch Mode.

MOTOR SELECTION
The watch winder supports up to 24 independent winding positions.
Use the ◀ and ▶ buttons to select the motor or watch position you wish to adjust.
The selected motor number will be highlighted on the display.
Display Indicators
Active Motor
- Underline visible beneath the motor number.
Inactive Motor
- No underline displayed beneath the motor number.
START / STOP FUNCTION
Press the Start / Stop button to activate or pause the selected winding motor.
This allows individual control of each watch position without affecting the remaining winders.
SETTING THE CLOCK
To adjust the system clock:
Step 1: Press and hold the Time Setting button for approximately 5 seconds.
Step 2: The hour display will begin flashing.
Use the adjustment buttons to set the correct hour.
Step 3: Press the Time Setting button again to move to minute adjustment.
Step 4: Use the adjustment buttons to set the minutes.
Step 5: Press the Save button to confirm and exit.
The internal clock memory can retain settings for approximately 6 months without power.
TURNS PER DAY (TPD)
The Turns Per Day setting determines how many rotations the selected watch receives over a 24-hour period.
Available Settings
- 650 TPD
- 750 TPD
- 850 TPD
- 1000 TPD
- 1950 TPD
To adjust the TPD setting:
- Select the desired motor.
- Press the TPD adjustment buttons.
- Choose the required Turns Per Day value.
For recommended TPD settings, refer to your watch manufacturer’s specifications.
NEW WATCH MODE
New Watch Mode is designed to quickly build power reserve in a watch that has stopped or is running low on power.
Activating New Watch Mode
- Select the desired watch position.
- Press and hold the Mode button for approximately 5 seconds.
- The display will indicate New Watch Mode activation.
Operation
The selected rotor will operate continuously for:
- 4 hours winding
- 8 hours rest
The cycle will then automatically repeat until New Watch Mode is cancelled.
Rotation Options
Depending on the selected direction setting, New Watch Mode can operate in:
- Clockwise
- Counter-Clockwise
- Bi-Directional
To exit New Watch Mode, press any control button.
The display will return to the standard Turns Per Day screen.
ROTATION DIRECTION
The winding direction can be adjusted to suit the requirements of different watch movements.
Press the Rotation Direction button to cycle through:
Clockwise (CW)
Rotor rotates clockwise only.
Counter-Clockwise (CCW)
Rotor rotates counter-clockwise only.
Bi-Directional
Rotor alternates between clockwise and counter-clockwise rotation.
For optimal performance, refer to your watch manufacturer’s recommended winding direction.
INTERIOR LED LIGHTING
Press the Light button to switch the interior cabinet lighting ON or OFF.
The LED lighting is designed to showcase your collection while maintaining low power consumption.
Security & Alarm Features
Vibration Alarm
To activate vibration alarm mode:
- Wake the keypad.
- Press the “C” button.
Two confirmation beeps indicate the alarm is active.
If the safe experiences significant vibration or movement, the alarm will sound for 20 seconds.
Entering a correct passcode or fingerprint will deactivate the alarm.
Incorrect Entry Alarm
If:
- An incorrect passcode is entered 3 consecutive times
OR - Fingerprint verification fails 5 consecutive times
The safe will:
- Sound an alarm for 20 seconds
- Enter lockout mode for 3 minutes
During lockout, all operations are temporarily disabled.
LOW BATTERY WARNING
When battery voltage becomes low, the safe will emit 5 warning beeps after successful unlocking.
Replace batteries as soon as possible to ensure uninterrupted operation.
If internal batteries become fully depleted, the safe may still be opened using:
- The external emergency battery pack
OR - The emergency override key
ANTI-SPY PASSCODE FUNCTION
For additional privacy, random numbers may be entered before or after your correct passcode.
As long as the correct passcode is entered consecutively within the sequence, the safe will unlock successfully.
Maximum total input length:
24 digits.
DURESS / INTIMIDATION ALARM
Your safe supports a silent intimidation alarm feature through the smart lock system and Tuya App connection.
To Configure
- Press the SET button.
- Press and hold the “E” button for 3 seconds.
- After the long confirmation beep, register:
- A dedicated fingerprint
OR - A dedicated passcode
- A dedicated fingerprint
Up to:
- 2 intimidation fingerprints
- 2 intimidation passcodes
may be stored.
When used, the safe will unlock while simultaneously triggering the silent alarm notification.
Important
For best performance, register separate fingerprints for:
- Standard unlocking
AND - Intimidation alarm operation
MUTE MODE
To enable silent operation:
- In standby mode, press and hold the “E” button for 3 seconds.
- The panel light will illuminate green.
In Mute Mode:
- Unlocking operations will remain silent
- Critical system alerts will still sound
This includes:
- Low battery warnings
- Alarm notifications
- System alerts
CLOSING THE SAFE
To lock the safe:
- Close the door firmly.
- Turn the handle fully anti-clockwise until locked.
EMERGENCY OPENING
If you forget your passcode or the electronic system becomes unresponsive, the safe may be opened using the Emergency Override Key.
Emergency Unlock Procedure
- Remove the override key cover.
- Insert the emergency key into the override key hole.
- Turn the key clockwise fully.
- Turn the handle clockwise fully to open the safe.
Important
After opening with the emergency key:
- Leave the door open
- Return the key to its original position
- Remove the key
- Replace the internal batteries immediately
Care & Maintenance
To maintain the premium finish and operation of your Westhill Watch Safe:
- Clean exterior surfaces using a soft microfibre cloth only
- Avoid harsh chemicals or abrasive cleaners
- Keep the fingerprint scanner clean and dry
- Replace batteries annually for optimal reliability
- Ensure the safe is installed on a stable, level surface
Power Supply
Only use the supplied Westhill power adapter.
Disconnect power when the watch winder will not be used for extended periods.
Rotor Protection
Never attempt to manually rotate the winding rotors.
Doing so may damage the internal drive mechanism.
Environmental Conditions
To maximise longevity and performance:
- Avoid direct sunlight
- Avoid excessive humidity
- Avoid dusty environments
- Keep the unit on a stable, level surface
Important Notes
Winding Requirements
Different watch brands and movements require different winding directions and Turns Per Day settings.
Please consult your watch manufacturer’s documentation for recommended settings.
Intelligent Winding Cycle
Your Westhill Watch Winder does not rotate continuously.
The programmed Turns Per Day are distributed intelligently across a 24-hour period to minimise unnecessary wear while maintaining power reserve.
Periods of inactivity between winding cycles are completely normal.
USB Power Option
Some models may also support power via Micro-USB.
Where applicable:
- Input: 5V / 1A–2A
- Adapter not included
Do not use both the AC adapter and USB power source simultaneously.
